When it comes to home improvement projects, one of the most essential skills to master is sanding. Whether you’re working on wooden furniture, walls, or floors, understanding how to sand properly can significantly enhance the quality of your finish. In this article, I’ll share everything you need to know about sanding, from the tools you’ll need to the techniques that work best. So, if you want to achieve that smooth, professional look, keep reading!
Understanding the Basics of Sanding
Sanding is a process that involves the use of abrasive materials to smooth surfaces by removing imperfections, old finishes, or rough edges. This technique is crucial for preparing surfaces for painting or staining, as it allows the new finish to adhere better and look more polished. But before diving into the actual sanding process, it’s important to know the different types of sandpaper and their uses.
Types of Sandpaper
- Coarse Grit (40-60): Ideal for heavy material removal, such as stripping paint or shaping wood.
- Medium Grit (80-120): Used for smoothing surfaces and removing scratches left by coarse grit.
- Fine Grit (150-220): Perfect for finishing touches and preparing surfaces for painting or staining.
- Extra Fine Grit (320+): Used for polishing surfaces or achieving a glass-like finish.
Choosing the right grit is essential for effective sanding. Starting with a coarse grit and gradually progressing to finer grits will yield the best results.
Essential Tools for Sanding
Having the right tools can make a huge difference in the sanding process. Here’s a list of essential tools you should consider:
- Sanding Block: A simple yet effective tool for hand sanding, especially on flat surfaces.
- Orbital Sander: A power tool that makes sanding faster and easier, ideal for larger areas.
- Detail Sander: Perfect for getting into tight corners and intricate designs.
- Dust Mask: Essential for protecting your lungs from harmful dust particles.
- Safety Glasses: Protect your eyes from dust and debris during the sanding process.
Preparing for the Sanding Process
Before starting to sand, preparation is key. Here are a few steps to ensure a smooth process:
- Clear the Area: Remove any furniture or obstacles that may get in your way.
- Clean the Surface: Dust and dirt can cause scratches, so make sure the surface is clean.
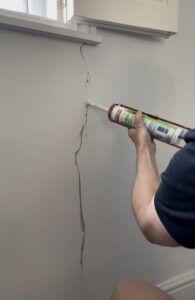
- Inspect the Surface: Look for any repairs needed before sanding; filling in holes or cracks will achieve a better finish.
Techniques for Effective Sanding
Now that you have your tools and your area prepared, let’s dive into some effective sanding techniques:
Hand Sanding Techniques
Hand sanding can be very effective for small projects or detailed work. Here’s how to do it:
- Use the Right Grip: Hold the sanding block firmly but not too tight. This will allow for better control.
- Sanding Direction: Always sand with the grain of the wood to avoid scratches.
- Even Pressure: Apply even pressure across the surface to achieve a uniform finish.
Power Sanding Techniques
When using power tools, a few additional tips can help:
- Keep the Sander Moving: Don’t stay in one spot too long; this can create uneven surfaces.
- Let the Tool Do the Work: Avoid applying too much pressure; let the sander’s weight do the job.
- Check Your Progress: Regularly stop to check your work and ensure you’re achieving the desired smoothness.
Common Mistakes to Avoid
Even experienced DIYers can make mistakes when sanding. Here are some common pitfalls to watch out for:
- Sanding Against the Grain: This can lead to visible scratches, making your finish look unprofessional.
- Skipping Grits: Jumping from coarse to fine grit without smoothing in between can leave scratches.
- Not Cleaning Up Dust: Failing to remove dust between sanding steps can ruin your finish.
- Over-Sanding: This can lead to uneven surfaces or even damage the material.
Frequently Asked Questions about Sanding
What is the best grit for sanding wood?
The best grit depends on your project. Start with a coarse grit (around 80) for heavy removal and work your way up to finer grits (220+) for finishing.
Can you sand painted surfaces?
Yes, sanding painted surfaces can help remove imperfections or prepare them for a new coat of paint. Always use a finer grit to avoid damaging the underlying material.
How do I avoid dust when sanding?
Using a vacuum attachment on your sander or working in a well-ventilated area can significantly reduce dust. Wearing a dust mask and safety glasses is also recommended.
How often should I change sandpaper?
Change sandpaper when it becomes dull or clogged. This will ensure that you maintain efficiency and achieve the best results.
Is sanding necessary before painting?
Yes, sanding is crucial before painting as it creates a smooth surface for better paint adhesion.
By mastering the art of sanding, you’ll not only improve the appearance of your projects but also extend the lifespan of your finishes. Remember, the key lies in preparation, using the right tools, and applying the correct techniques. Happy sanding!


