
When it comes to home improvement, one of the most impactful projects you can undertake is tile installation. Whether you’re looking to revamp your bathroom, kitchen, or any other area of your home, tile can add both functionality and aesthetic appeal. In this article, I will guide you through the ins and outs of tile installation, sharing tips and insights that can make your project a success.
The Benefits of Choosing Tile
First off, let’s talk about why tile is such a popular choice among homeowners. There are numerous advantages that come with this versatile material:
- Durability: Tile is known for its longevity. It can withstand heavy foot traffic and resist scratches, making it ideal for both residential and commercial spaces.
- Variety: With countless styles, colors, and textures available, tile offers endless design possibilities. You can easily find something that matches your personal taste.
- Maintenance: Tiles are generally easy to clean and maintain. A simple wipe-down with a damp cloth can keep them looking new for years.
- Water Resistance: Particularly in areas like bathrooms and kitchens, tile’s resistance to water makes it a smart choice to prevent mold and mildew.
Preparing for Tile Installation
Before diving into the actual installation process, preparation is key. Here are some crucial steps to ensure a smooth experience:
1. Choosing the Right Type of Tile
Different types of tiles serve different purposes. For example:
- Ceramic Tiles: Great for walls and floors, they come in various styles and are relatively inexpensive.
- Porcelain Tiles: Denser and more durable than ceramic, they are suitable for high-traffic areas.
- Glass Tiles: Perfect for accents and backsplashes, they add a vibrant touch but can be more challenging to install.
2. Measuring the Space
Accurate measurements are critical. Make sure to measure the length and width of the area where the tiles will be installed. Don’t forget to account for any doors or fixtures that might affect your layout. This will help you determine how many tiles you will need, plus some extra for waste.
3. Gathering Your Tools
Before starting, gather all necessary tools. Here’s a handy checklist:
- Tile cutter
- Trowel
- Level
- Rubber mallet
- Grout float
- Spacers
- Bucket for mixing thin-set mortar
The Installation Process
Now that you’ve prepared thoroughly, it’s time to get your hands dirty! Here’s a step-by-step guide to the installation process:
Step 1: Prepare the Surface
The surface where the tiles will be installed must be clean, dry, and level. If you’re tiling over an existing floor, ensure it’s sturdy enough to support the new tiles without cracking.
Step 2: Apply Thin-Set Mortar
Using your trowel, spread thin-set mortar onto the surface, working in small sections. Be sure to create ridges in the mortar, as this helps with adhesion. The trowel’s notched side is great for this!
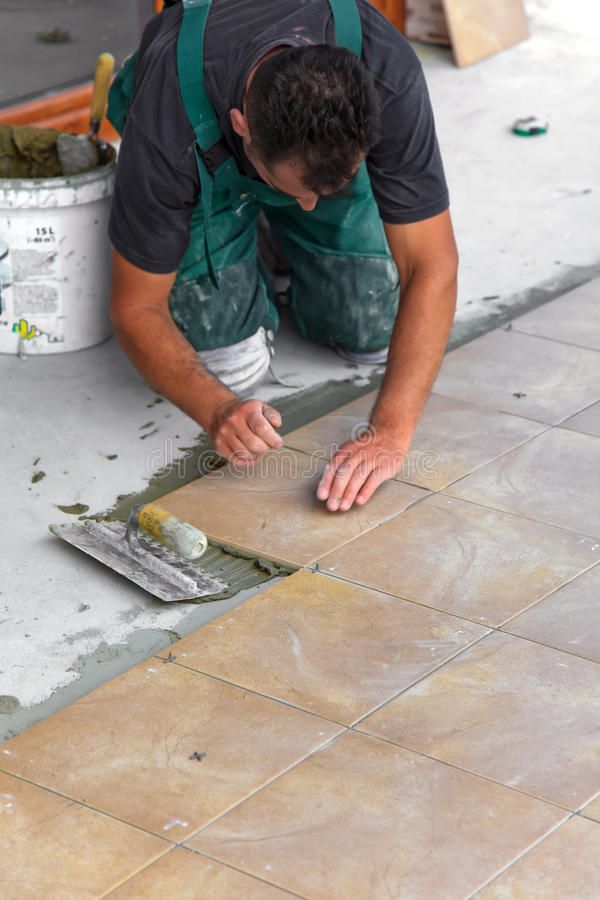
Step 3: Lay the Tiles
Starting from the center of the room (or a designated line), lay your first tile, pressing firmly into the mortar. Use spacers to ensure even gaps between tiles, which will be filled later with grout. Keep checking with a level to ensure tiles are even.
Step 4: Cutting Tiles
When you reach the edges, you’ll likely need to cut tiles to fit. A tile cutter will make this process easier. Measure carefully, mark the tile, and make your cut!
Step 5: Grouting
Once the tiles are set and the mortar has dried (usually 24 hours), it’s time to grout. Remove spacers and use a grout float to apply the grout, working it into the gaps between tiles. Wipe any excess grout off the surface with a damp sponge.
Tips for a Successful Tile Installation
Here are some practical tips that can help you during your installation:
- Take your time! Rushing can lead to mistakes.
- Use a chalk line to ensure straight lines.
- Consider using a sealant after grouting to protect your tiles and grout from stains.
- Don’t hesitate to ask for help if you’re unsure about any step.
Frequently Asked Questions
What is the best type of tile for a kitchen?
Porcelain and ceramic tiles are excellent choices for kitchens due to their durability and ease of maintenance.
How long does tile installation take?
The time varies based on the size of the area and the complexity of the design, but a typical installation can take a few days.
Can I install tiles myself?
Absolutely! With the right tools and guidance, DIY tile installation is achievable for many homeowners. Just be prepared to invest time and effort.
What should I do if a tile breaks after installation?
If a tile breaks, it can be carefully removed and replaced with a new one without disturbing the surrounding tiles.
Tile installation can be a rewarding process that enhances the beauty and functionality of your home. With careful planning and execution, you can create stunning spaces that you will enjoy for years to come. So roll up your sleeves, gather your materials, and let’s get tiling!